
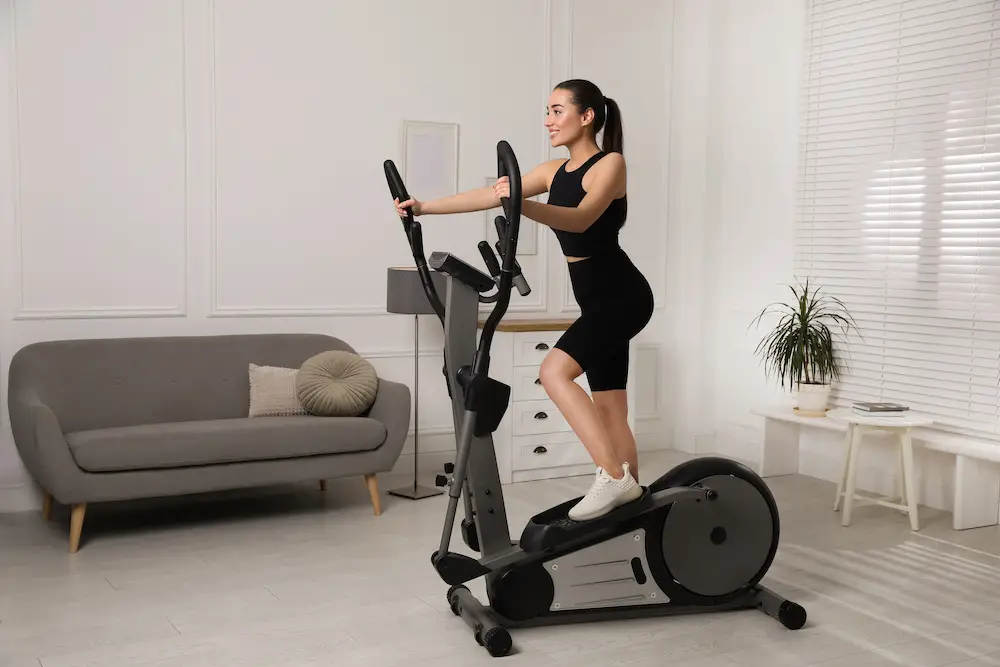
The elliptical machine is a huge and heavy piece of gym equipment that improves almost every muscle in your body, in addition to helping you lose weight.
However, if you are moving to a new place, these characteristics will be your downfall.
Moving an elliptical machine is extremely difficult and may even cause damage to the equipment.
That’s why whether you are moving out or just want to clean yours, you need to learn how to disassemble an elliptical machine.
Getting To Know the Parts of an Elliptical Machine
To understand how to disassemble an elliptical machine, you first need to learn about its parts.
There are hundreds of components that comprise this equipment. Nonetheless, we can group them into four major parts:
Flywheel
Every elliptical trainer has a flywheel, which is basically the drive system of the entire machine. You will find it at the bottom, either in front or between the foot pedals.
An elliptical machine with a flywheel at the front is called a front-drive trainer. If the flywheel is between the pedals, it’s called a center-drive trainer.
The flywheel receives the pressure that you exert on the pedals.
Therefore, it is also primarily responsible for the level of resistance that your entire elliptical machine provides.
Moreover, the flywheel influences the smoothness of the elliptical trainer and how loud or quiet the system operates.
It allows the foot pedals and the handlebar components to move. So, the absence of the flywheel would render your machine useless.
More often than not, a heavier flywheel indicates a longer lifespan for the machine. Its weight can range from 13 to 35 pounds.
Console and Electronic System
The console unit is located right between the handlebars. It is primarily responsible for the entire electronic system or any part that needs electricity to work.
This part is particularly important because it allows you to adjust the incline of the elliptical trainer.
Moreover, some manufacturers do not include the console in the warranty, so you may want to handle this with care.
More sophisticated machines allow the console to display certain tracking features, like heart rate monitoring, which is important to know when exercising.
The consoles also allow you to use specific presets included in the machine to adjust the intensity of your workout.
Deck and Rollers
The deck and rollers connect the foot pedals to the flywheel and handlebar. They are the parts that allow the foot pedals to move back and forth.
The deck is the bottommost part of the machine and is what keeps the elliptical upright. On the other hand, the rollers allow the pedal to move back and forth along the deck.
Well-designed machines often have a longer deck to give more room for the foot pedals to move. This also provides more space for your legs.
That said, it is also important to consider your height. Obviously, a longer stride is not the best option for shorter people.
An excellent workout machine would often allow you to adjust the stride capacity to fit your needs better.
Foot Pedals
Lastly, we have the foot pedals, which are the parts that you step on to perform elliptical exercises. This part significantly affects your experience.
Oversized or uncomfortable foot pedals may cause various problems, with back pain being on top of that list.
One of the many benefits of the elliptical machine is that it is easy on the body. This should not be compromised by low-quality foot pedals.
How To Disassemble an Elliptical Machine
Now that you know the different parts that make up this machine, it’s time to take it apart.
Elliptical disassembly is actually not as difficult as it looks. Here is a step by step guide to walk you through the entire process:
Step 1: Unplug the machine.
The first thing you want to do is perform basic safety measures, which means not forgetting to unplug the machine.
Keep in mind that this piece of exercise equipment runs on electricity. Unplugging means you eliminate the risk of injuries caused by electrocution.
Step 2: Unscrew the fitness unit.
Next, grab a small plastic bag and start working on the fitness unit. This is the console located right between the handlebars.
More often than not, the drive unit is attached to the machine using Phillips-head screws. Grab your Phillips screwdriver to unscrew it.
After that, place the screws inside the plastic bag and label it to ensure you don’t switch them for the other separate pieces of the machine.
Carefully remove the head from the rest of the equipment, being extra careful not to damage the wires.
Step 3: Disconnect the electric wires.
Next, use adhesive tape or duct tape to stick the wires to the body of the machine. Doing this ensures that the wires don’t fall into the unit.
You can also use electric tape because this can also function as wire protection to avoid damage when you move the equipment.
Some of these wires connect to the unit with screws or wire nuts, so you may also need screwdrivers for this step.
Make sure you do all these with extra care, as yanking or pulling the wire may cause irreparable damage.
Step 4: Remove the handlebars.
Despite its size, the handlebar is perhaps the easiest part to detach from the machine.
There are no wires connected to this component, so it won’t be as challenging as the other parts mentioned earlier.
Often, the handlebars connect to the unit with Phillips-head screws. So, you just need to unscrew each one with a screwdriver.
Instead of storing the screws in a plastic bag, it would be easier if you screw them back into place but without the handlebars. Doing so would ensure you don’t lose them.
Moreover, it prevents them from getting mixed with other screws intended for a different part of the machine.
Step 5: Unhook the resistance assembly.
The next step is to remove the resistance assembly or the flywheel from the frame. This is often connected to the unit via several bolts.
Instead of a screwdriver, you might need an Allen wrench for this step.
Remove the bolts and place them in a small plastic bag or container and label it.
After doing so, you should be able to easily unhook the entire resistance assembly from the hook by pulling it out.
Remember that this is often the heaviest part of the machine. So, it might be best to have someone to assist you so as not to get injured or damage the flywheel.
Step 6: Remove the pivot arms.
Aside from the handlebars, some elliptical trainers include pivot arms. These are the parts you push and pull as you step on the foot pedals.
Pivot arms are often connected to the rest of the machine through the bottom unit or flywheel. You just need to find this connection and unscrew it.
Some elliptical machines also attach to the neck of the unit that extends from the flywheel. Make sure you unscrew this part, as well.
Most pivot arms use Allen screws. After removing them, place them in a separate plastic bag or container and label it.
Step 7: Remove the pedals.
The pedals connect to the unit through the base or the deck.
You will need to locate the mounting bolts and unscrew them to remove the foot pedals successfully.
It is also best if you first determine whether or not wires run through the pedals. Some elliptical machines do this to include a number of features on the pedals.
Once you’ve unscrewed the bolts, slowly remove the pedals and see if there are connecting wires.
If there are, disconnect them and tape them down to the deck to prevent them from getting into the unit.
Step 8: Take the elliptical machine frame apart.
It might feel like you’ve done a lot, but the elliptical machine still looks bulky, if not the same. That’s fine; you’ve already done the most challenging parts.
Taking apart the elliptical machine frame is relatively easy. Firstly, you need to locate the screws at the base or deck of the unit.
These screws sort of keep the machine together, so unscrewing them is the final step in the process.
Most elliptical machines use Allen screws for this, so make sure your Allen wrench is still with you.
Unscrew the bolts or screws and place them in another container.
Doing this should allow you to take the frame apart, reducing the machine’s size to almost half its original size.
If you have bubble wraps, use them to cover every component of the machine. This extra step prevents scratches or dents that can compromise the overall quality of the trainer.
Once you’ve done that, your elliptical machine is ready to go anywhere you need it to!
Disassembling an Elliptical Machine
Elliptical trainers are the hottest and most efficient gym equipment people use for whole-body exercises.
It’s no wonder that a lot of the owners prefer to bring the equipment with them whenever they move to another home.
Even if you’re not moving house, learning how to disassemble an elliptical is an integral part of maintenance when you need to deep clean it.
While the process of disassembling it may vary depending on the unit or model, the basic principles remain the same.
Nonetheless, if you are still having a hard time, it might be best to contact fitness machine technicians to help you.